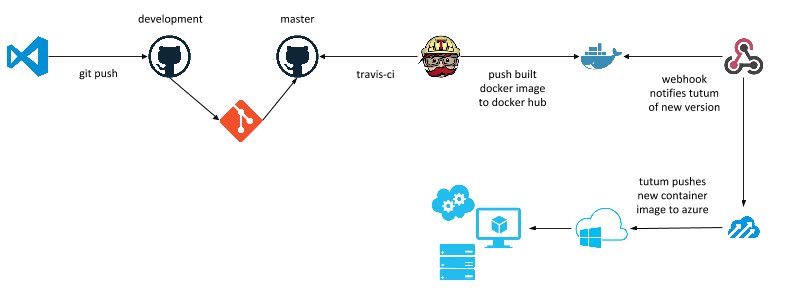
Getting a "code to deployment" workflow is a story many organizations want to have nailed down when looking into new technology stacks and architectures such as ASP.NET 5 and the container story like Docker.
I hear from business leaders comments like; "...that's great, but how do we deploy this, scale it. What does the development pipeline look like?"
Great questions.
For my own projects I wanted to be able to "just write code" and have the rest of the process handled. Not have to worry about how does it get built, deployed, scaled etc. Here is a working sample technology stack using all the cool kids on the block and some old players too.
Setting It All Up
The initial setup is not hard, but there are some moving parts.
- GitHub - setup up your repository for your project with 2 branches minimally;
masteranddevelopmentfor example. - Docker Toolbox - go to docs.docker.com and get your local environment setup by walking through the setup instructions, including establishing a Docker Hub account.
- Travis-CI - head over to travis-ci.com and login with your GitHub credentials. Select the repository you created for the project.
- Azure - * if you do not have an Azure account, there is a free trial available
- Tutum - Create a new account here by logging in with your Docker Hub account credentials.
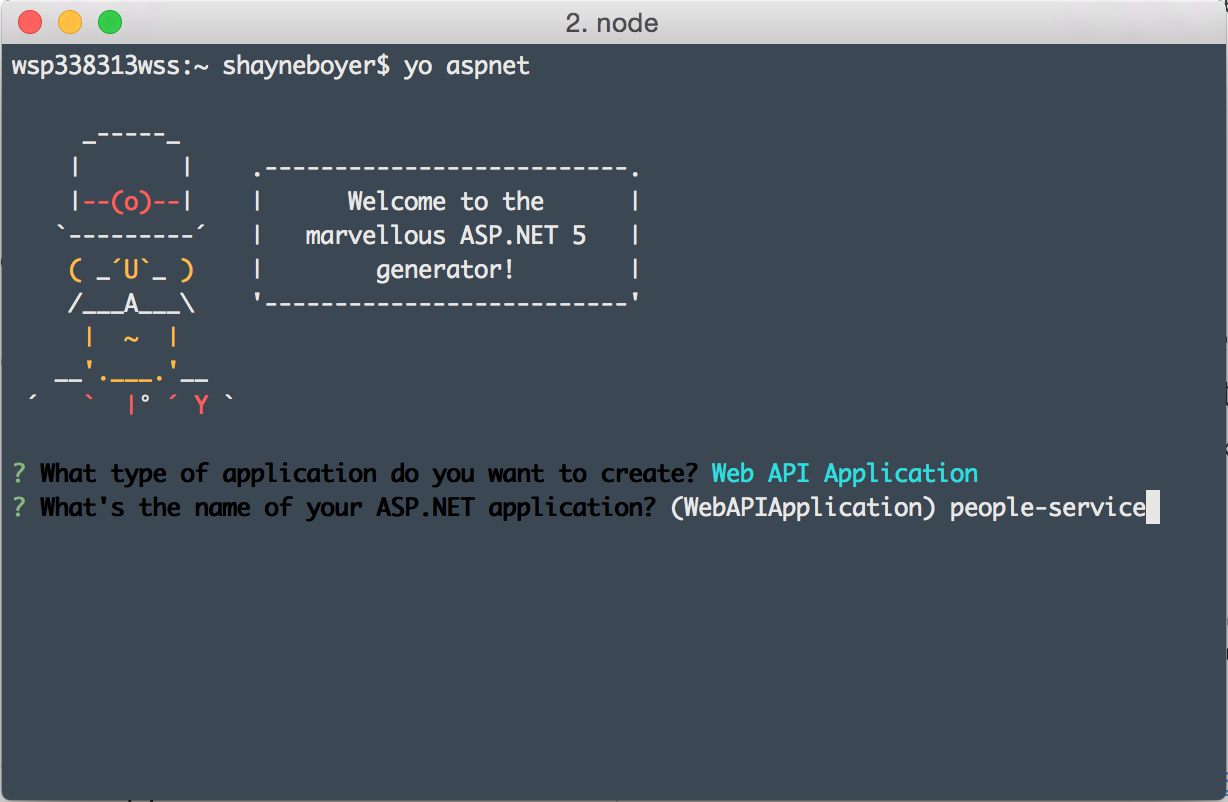
Lastly for the development of the application, any IDE or editor is fine; Visual Studio Code is my editor of choice lately. For project creation, the yeoman ASP.NET generator npm install -g generator-aspnet is what we'll use to scaffold the Web API project.
The Developer Story
- Visual Studio Code
- GitHub
This is a simple ASP.NET 5 Web API application. The editor of choice is Visual Studio Code (code.visualstudio.com) on OS X and we'll use the aspnet yeoman generator to create the project. github.com/omnisharp/generator-aspnet.
$ cd people-service
$ dnu restore
$ code .
* Edit your project.json and add the following to your web command in order set the entry point url. If you are getting ERR CONNECTION REFUSED when running your application under Docker this probably the case.
"commands": {
    "web": "Microsoft.AspNet.Server.Kestrel --server.urls http://0.0.0.0:5000"
  },
For more on creating applications with the generator see ASP.NET Anywhere w/ Yeoman and Omnisharp by Shayne Boyer & Sayed I. Hashimi in MSDN Oct.
This will create the web api application and restore the dependencies from nuget. The code . command is a shortcut that launches VSCode in the current folder and can be found on the VSCode site.
Test the site by running the dnx web command from terminal and browsing to http://localhost:5000/api/values.
At this point the shell of the web api application is complete.
Docker
The yeoman generator does include a Dockerfile by default with the project when it is created.
FROM microsoft/aspnet:1.0.0-beta8

COPY project.json /app/
WORKDIR /app
RUN ["dnu", "restore"]
COPY . /app

EXPOSE 5000
ENTRYPOINT ["dnx", "-p", "project.json", "web"]
The Dockerfile here states that it will use the base microsoft/aspnet:1.0.0-beta8 image; which is the official image uploaded to Docker Hub by Microsoft. Then it will set /app as the working directory, run dnu restore (just as you did), and copy our application to the /app directory. Then the container will run the dnx web command and the application will be running on port 5000 using EXPOSE 5000.
Let's make a few changes to this file. First, change the base image to
FROM cloudlens/dnx:1.0.0-beta8
This image is courtesy of Mark Rendle [@markrendle](https://twitter.com/markrendle
), it's a bit smaller but also the same base official image for node.js and Python. I like that I can use the same base regardless of the tech stack.
Next, move the last two lines ...EXPOSE to before the COPY line. This will be more efficient by leveraging the build cache in Docker. Now your Dockerfile should look like this.
FROM cloudlens/dnx:1.0.0-beta8

EXPOSE 5000
ENTRYPOINT ["dnx", "-p", "project.json", "web"]

COPY project.json /app/
WORKDIR /app
RUN ["dnu", "restore"]
COPY . /app
Build your Docker image using the following command. Replace the <username>/<projectname> with what your values are in Docker Hub are. For instance, for me spboyer/people-service
docker build -t <username>/<projectname> .
Next, you can now test your docker image on your local machine using
docker run -t -d -p 5000:5000 <username/projectname>
browse to http://0.0.0.0:5000/api/values
Travis-CI

.travis.yml file.

Browse to travis-ci.org and login using your GitHub credentials and select the repository you like to enable. In this case people-service.

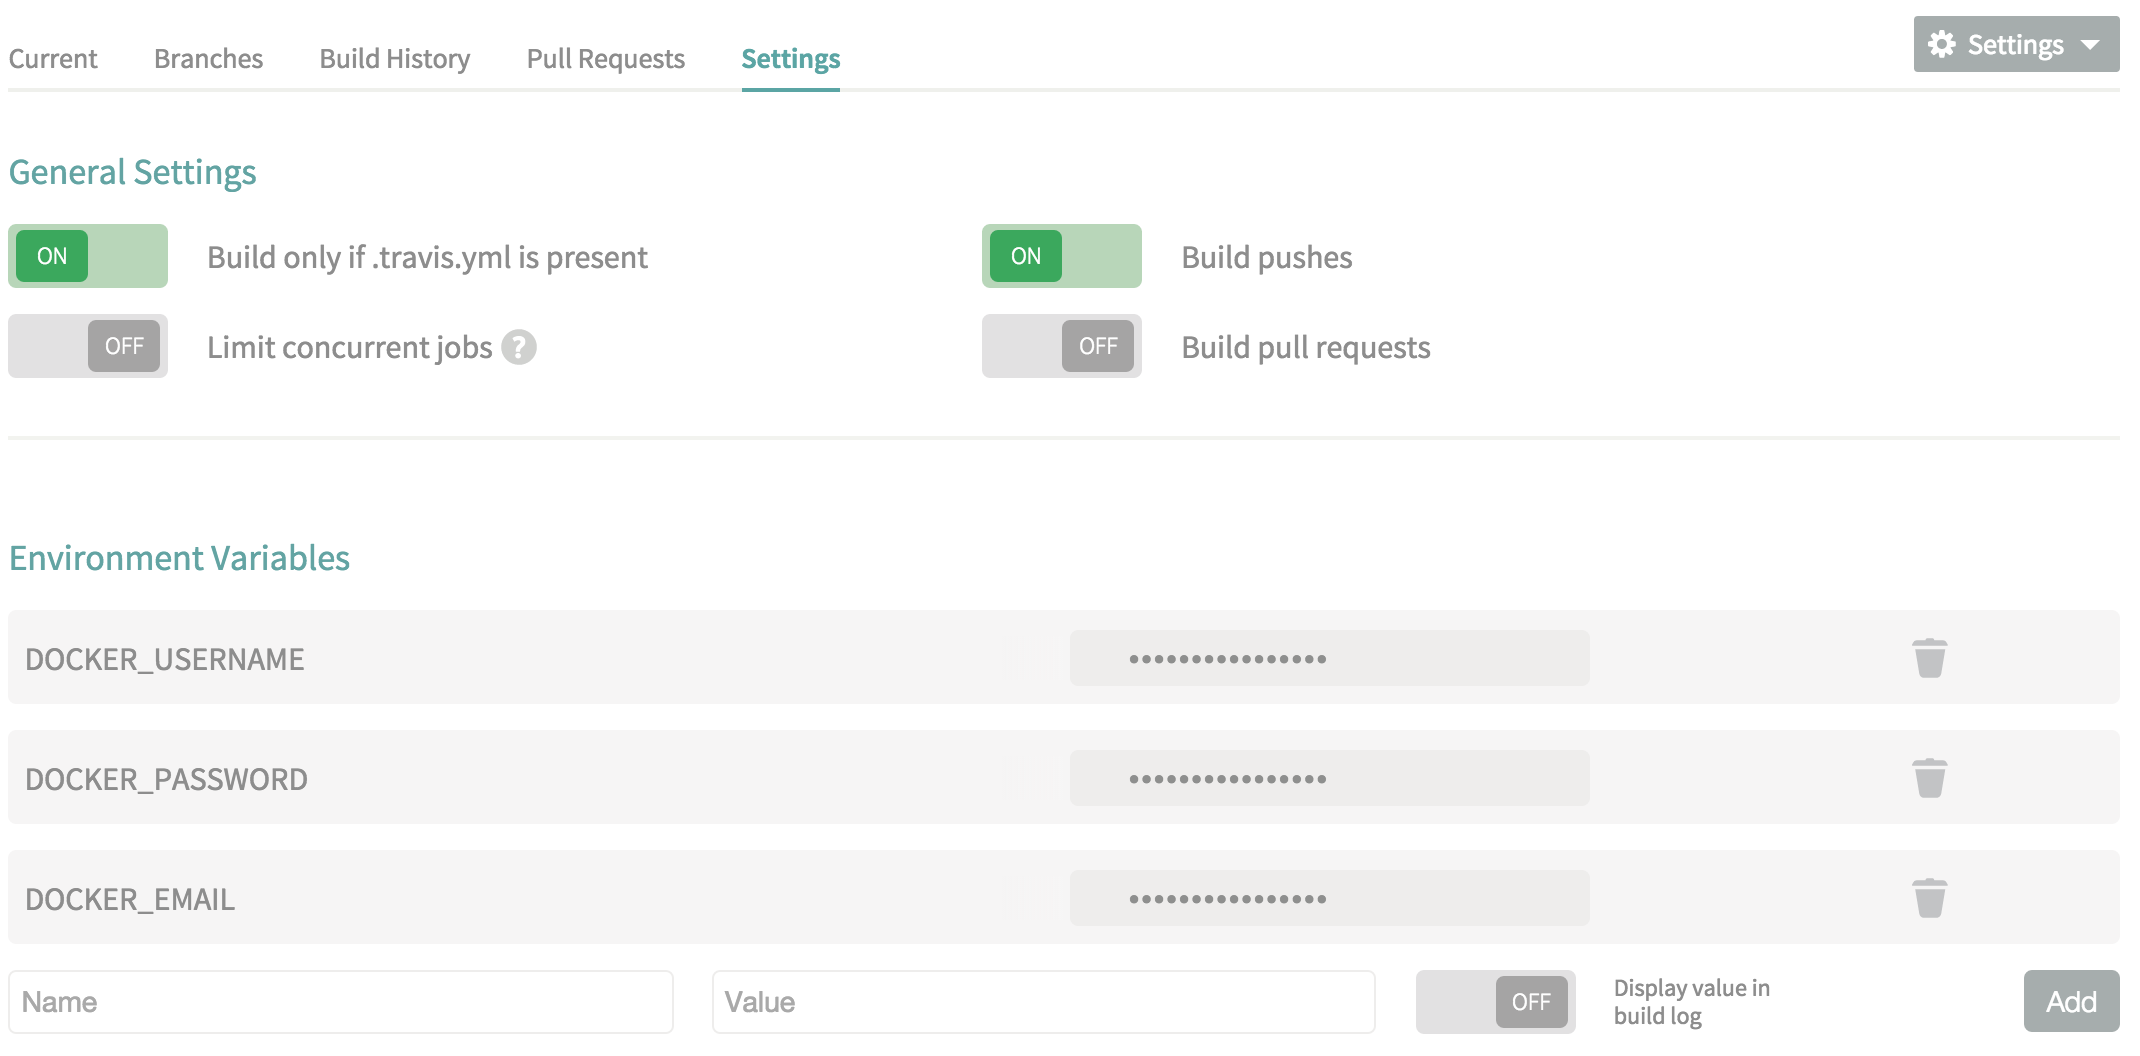
For Docker integration, your Docker Hub username, password and email will need to be added to the Travis Environment variables. One important note please make sure that the Display value in build log is set to false.
Next, add the .travis.yml file to the root of the project.
language: ruby

# whitelist
branches:
  only:
    - master

services:
    #Enable docker service inside travis
    - docker

before_install:
    - docker login -e="$DOCKER_EMAIL" -u="$DOCKER_USERNAME" -p="$DOCKER_PASSWORD"

script:
    #build the image
    - docker build --no-cache -t spboyer/people-service .
    #tag the build
    - docker tag spboyer/people-service:latest spboyer/people-service:v1
    #push the image to the repository
    - docker push spboyer/people-service
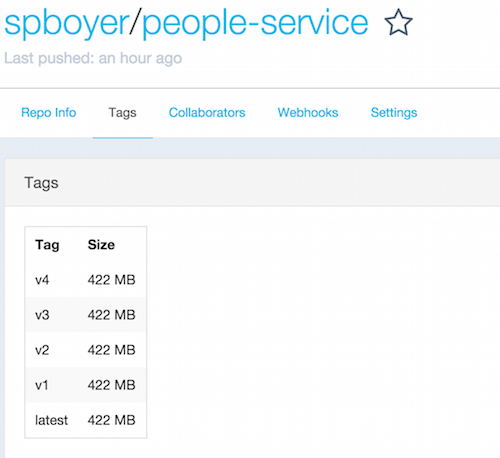
The purpose of Travis is to watch our GitHub repo for commits to the master branch, build - test (if we have them), then build the Docker image and push the artifact to Docker Hub. Upon a successful build you will see the following:
Travis-CI:
 For the complete output of the build click here.
Docker Hub:
A couple of notes here:
whitelist: only building themasterbranchservices: enable Docker with- dockerbefore_install: using the Docker credentials set in the Travis environment variables to log into Docker Hub for pushing our image upon completion- docker tag: this command tags the image with the version, each checkin of the code to github, I'd typically up this.- docker push: sends:latestand:v*images tospboyer/people-service
Checkpoint
Here is a good time for a phew! Depending on what you've worked with in the past this is a lot to swallow.
- yeoman (
yo aspnet) - yaml
- ASP.NET 5 (dnx, dnu)
- Travis-CI
- GitHub
Next getting the deployment of the application/Docker image to Azure via Tutum.
Tutum

I will not restate their how to as they have very excellent walk through. Here are the steps however to getting setup
- Link your Azure Account https://support.tutum.co/support/solutions/articles/5000560928-link-your-microsoft-azure-account
- Create a Node Cluster - https://support.tutum.co/support/solutions/articles/5000523221-your-first-node
- Create the Service - https://support.tutum.co/support/solutions/articles/5000525024-your-first-service
These are the basic steps needed to get setup and started with Tutum and Azure. Here are some additional details around what I did getting this total solution working.
First, I wanted to makes sure that I could browse to the url without specifying a port. By default, the container port is setup to be dynamic.

You can set this to be port 80 by clicking the dynamic and changing it to 80 or whichever port you like. After doing so, you will see the published port on the left of the service details screen display 80>5000/tcp. This means that port 80 is mapping to port 5000 of the container. Now you can browse to http://site.io instead of http://site.io:33678
Finally, we want to setup a trigger so that whenever a new version of the Docker image is pushed to Docker Hub tagged with :latest; Tutum will have a webhook endpoint for Docker Hub to post a message to. This POST http call will trigger Tutum to pull the spboyer/people-service:latest image and redeploy to our Azure infrastructure.
To do this, open the Triggers tab inside you service detail.

Fill in the name of the trigger, choose Redeploy and click Add. A url will be provided. Copy the url and head to the Docker Hub Repository where the image is being hosted.
Select the Webhooks link, click Add and paste the url.
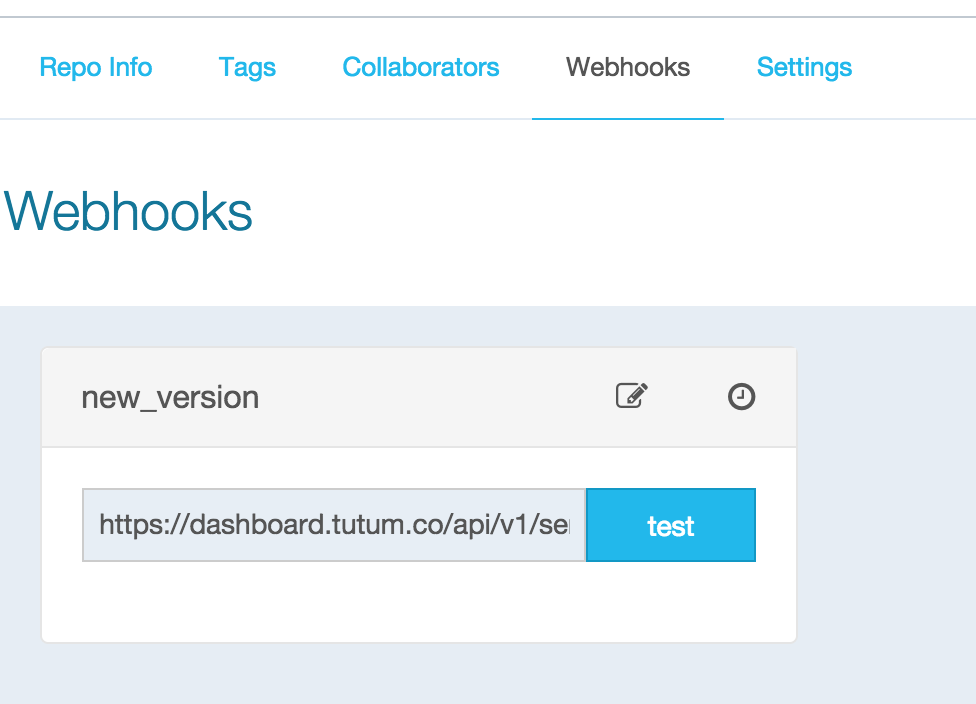
Whenever a new image is pushed to the Docker Hub repo with the :latest tag, the Webhook will POST to the url causing redeploy to occur.
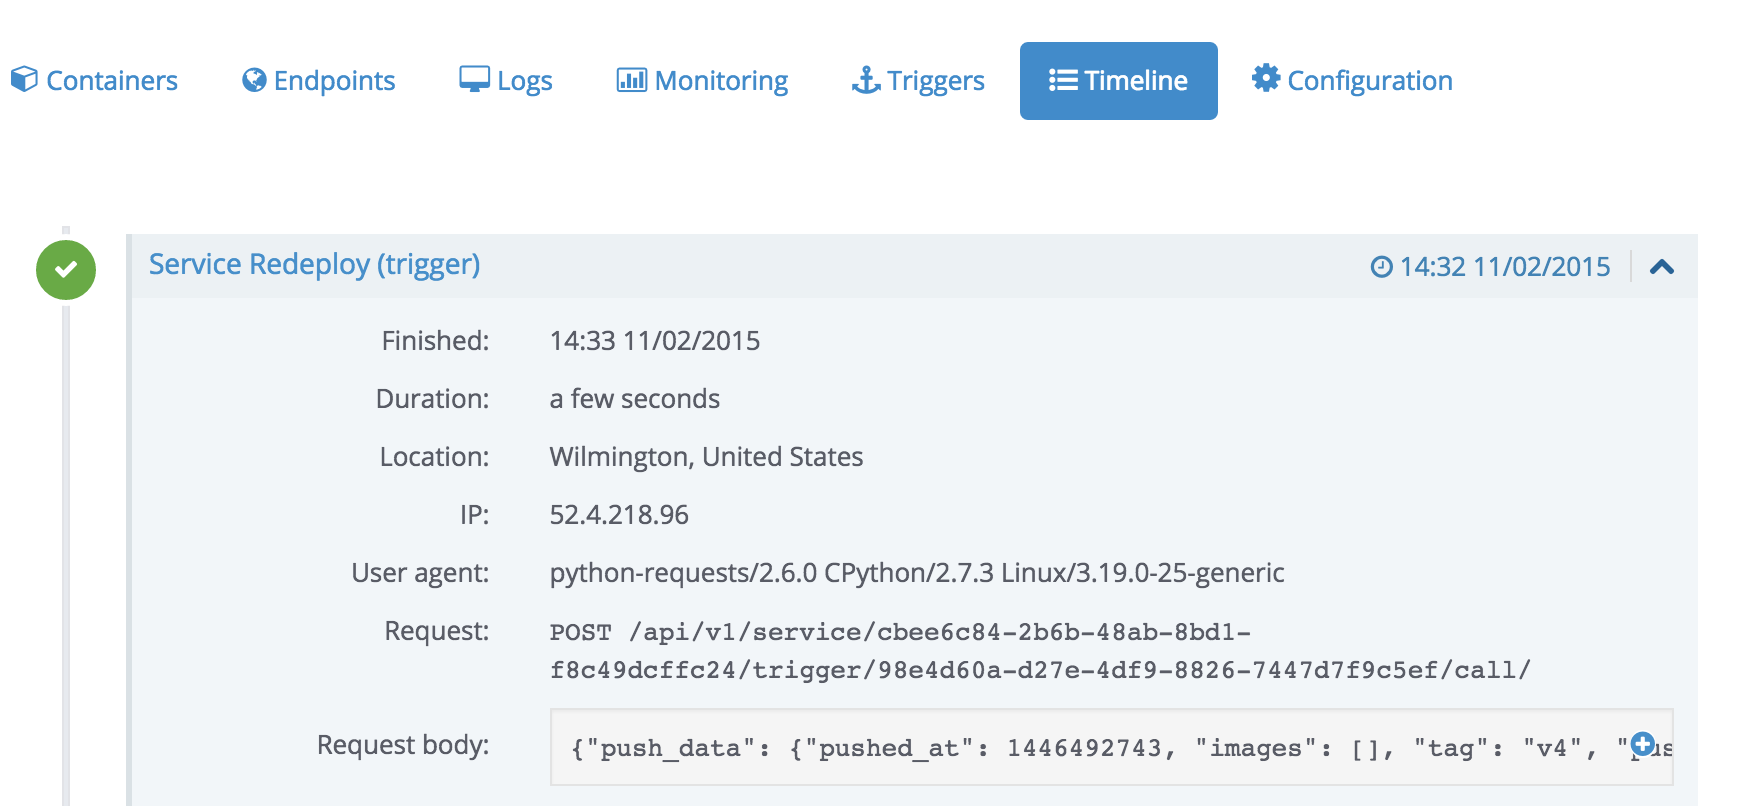
An example of the logs (Timeline) from Tutum for a Redeploy
Azure
When the service node is created, you can log in and see the Virtual Machines being created as if you did it yourself.
 When the containers and images are being deployed, all of the ports are created in the Linux VM for you without you needing to know how to do so etc.
 Give this a try! Comment, share, and reach out to me on twitter @spboyer
